We firmly believe in the motto “Buy Quality, Buy Once” and design our products to be durable, long-lasting and repairable. We recognise that a bent leg pole should not result in a disposed chair, and we back it up with our category-defining 5-Year Warranty covering manufacturing defects* in materials and workmanship.
When you purchase a product from us and are eligible for warranty, you will have the option to receive spare poles, hubs, shock cord, end caps and rubber feet for our most popular products to carry out your own repairs at home. We want to make sure that you are confident in self-repairing your products and have detailed the most important instructions below.

CARE & STORAGE
How do I clean my chair’s seat, stretcher's bed fabric or table top?
Seats, bed fabrics, table tops and carry bags are not machine washable. We advise that you gently clean dirty spots with warm water.
To deep clean your table top, you can use disinfectant wipes and/or spray after washing the fabric with warm water.
How do I clean my product's frame?
You can clean your frame using warm water and a mild detergent. If the frame is exposed to salt water, always rinse with fresh water and leave to dry before packing away for storage.
How do I store my products correctly?
Make sure to clean off any dirt or debris from your product before storing it in a dry location. Your gear should never be stored damp or wet. All Helinox frames are anodised to protect against corrosion. However the anodised coating will be fighting a losing battle if you pack your product away wet and leave it that way.
Plastic Endcap Repair

1. Remove chair/stretcher cover.
2. Locate damaged endcap.
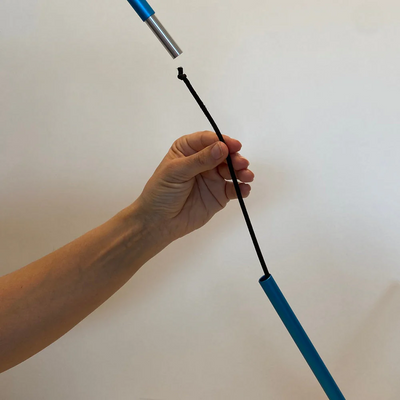
3. Pull the plastic endcap out until the shock cord is visible.

4. Remove the knotted end of the shock cord from the damaged endcap and dispose of it.

5. Take your new plastic endcap and push the knotted end of the shock cord inside of it.
6. Push the new plastic endcap into the pole.
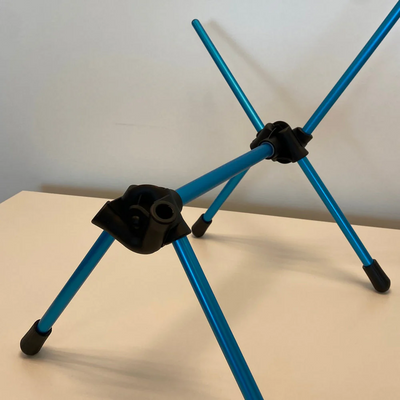
Broken Pole Repair
END CAP REMOVAL
1. Remove chair/stretcher cover.
2. Locate the damaged shock cord and identify which poles it connects.
3. If the pole is only attached to a plastic end cap, see point A. If the pole is attached to a Rubber Foot as well, please see point B first, then A.
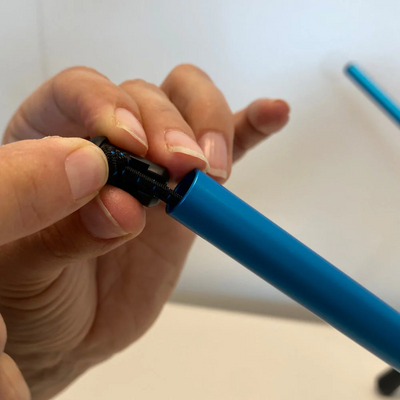
A. Unscrew the plastic endcap on one of the connected poles and pull it out until the shock cord is visible.
B. For an easier removal, put your rubber foot in a bowl of hot water for up to 7 minutes before trying to pull it off.
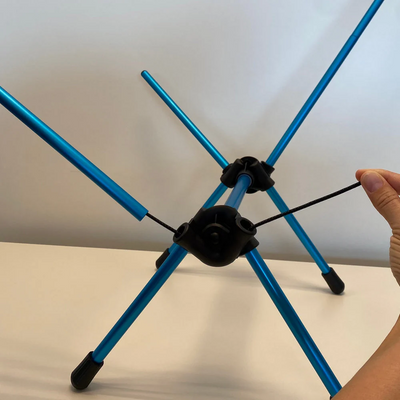
SHOCK CORD REMOVAL
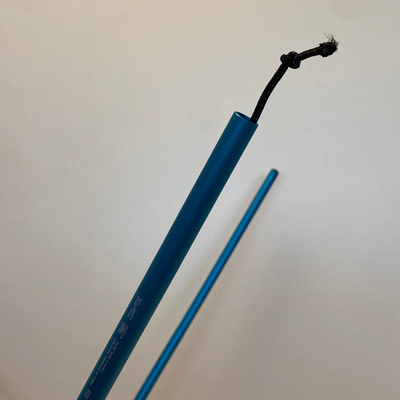
4. Cut the shock cord in two (skip this step if shock cord is already fully severed in two).
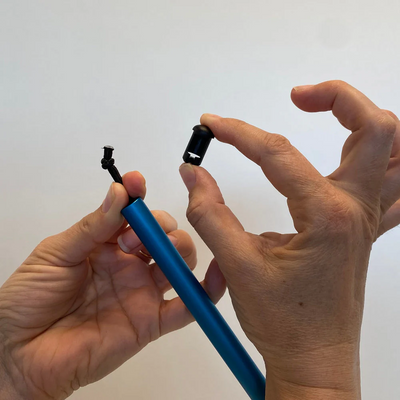
5. Pull out the knotted end of the shock cord from the plastic endcap and set it aside.
BROKEN POLE REMOVAL
6. Remove the damaged pole(s) from the shock cord.
ADDING THE NEW POLE
7. Insert the shock cord through the new pole(s), as well as the other pole(s) if needed.
8. Tie a knot at said end of the shock cord and push the knot inside of the plastic endcap.
9. Push the plastic endcap back into the pole.


Fabric Repair

1. Identify the damaged area of the seat cover.

2. Measure the hole/torn area and cut out a patch of repair tape according to its dimensions.

3. Carefully stick the repair tape onto the hole and its immediate surroundings.

4. Done!
SHOCK CORD REPAIR
END CAP REMOVAL
1. Remove chair/stretcher cover.
2. Locate the damaged shock cord and identify which poles it connects.
3. If the pole is only attached to a plastic end cap, see point A. If the pole is attached to a Rubber Foot as well, please see point B first, then A.
A. Unscrew the plastic endcap on one of the connected poles and pull it out until the shock cord is visible.
B. For an easier removal, put your rubber foot in a bowl of hot water for up to 7 minutes before trying to pull it off.
SHOCK CORD REMOVAL
4. Cut the shock cord in two (skip this step if shock cord is already fully severed in two).
5. Pull out the knotted end of the shock cord from the plastic endcap and set it aside.
6. Remove the remaining shock cord from inside the poles and the connecting hub. Undo the knots for an easier removal.
INSERTING NEW SHOCK CORD
7. Take your new shock cord and insert one of its ends through the pole(s).
8. Tie a knot at said end of the shock cord and push the knot inside of the plastic endcap.
9. Push the plastic endcap back into the pole.
10. Insert the other end of the shock cord in the connecting hub until it comes out the other side.
11. Repeat steps 6-9 for this end of the shock cord.